Install NexusM on TrueNAS SCALE
Run NexusM as a Docker app on TrueNAS SCALE, with persistent storage so your settings, users and libraries survive a reboot. Verified end to end on TrueNAS SCALE 25.10 "Goldeye".
Verified on TrueNAS SCALE 25.10.5 "Goldeye" (Community Edition). TrueNAS CORE is not supported: it is FreeBSD based and has no Docker. Use TrueNAS SCALE, which runs the "Apps" container system.
Why persistence matters (read this first)
NexusM stores all of its state inside the container at fixed paths. TrueNAS recreates the container on every app restart and on every system reboot, which erases anything that is not mapped to a persistent ZFS dataset. If you skip the storage step, NexusM boots to a fresh install every time. This is the single most common mistake, so the guide gives it the most attention.
Map these container paths to persistent storage:
| Container path | Contents | Persist? |
|---|---|---|
/app/NexusM.conf | Main config file (a single file). Holds server settings and your library folder paths. | Required |
/app/data | SQLite databases: users, libraries, watched state, everything. | Required |
/app/assets | Generated metadata, thumbnails, posters and covers. | Recommended |
/app/logs | Application logs. | Optional |
/app/cache | HLS transcode cache. Regenerates on demand. | Optional |
Prerequisites
- TrueNAS SCALE 24.10 "Electric Eel" or newer. This guide was written on 25.10 "Goldeye".
- A storage pool that is not the boot pool. TrueNAS will not place app data on the boot device, so you need at least one extra disk to create a data pool.
- If you are testing in a VM: 8 GB or more of RAM, 2 or more vCPUs, a boot disk, and a separate data disk. For a settings-persistence test a 10 to 16 GB data disk is plenty, because media libraries are mounted separately and do not live on this pool.
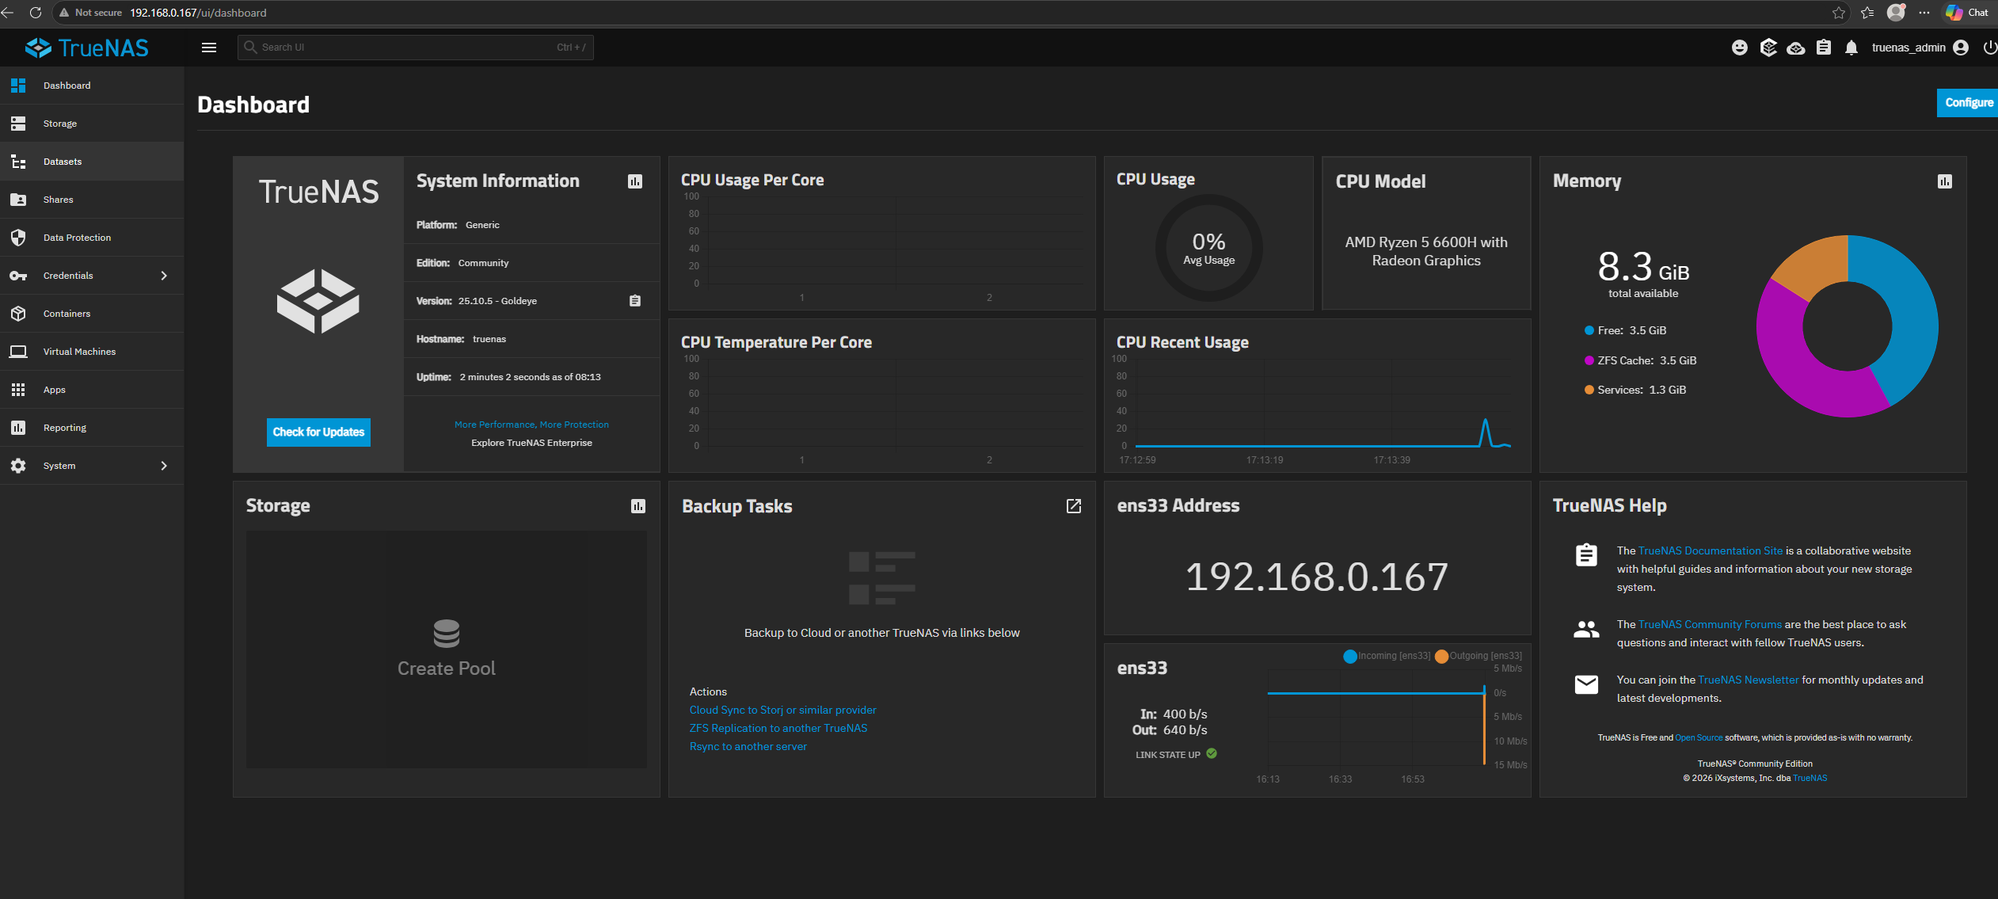
Step 1: Create the storage pool
TrueNAS needs a data pool on a non-boot disk before you can create datasets or install any app.
- Storage in the sidebar, then Create Pool.
- Name it
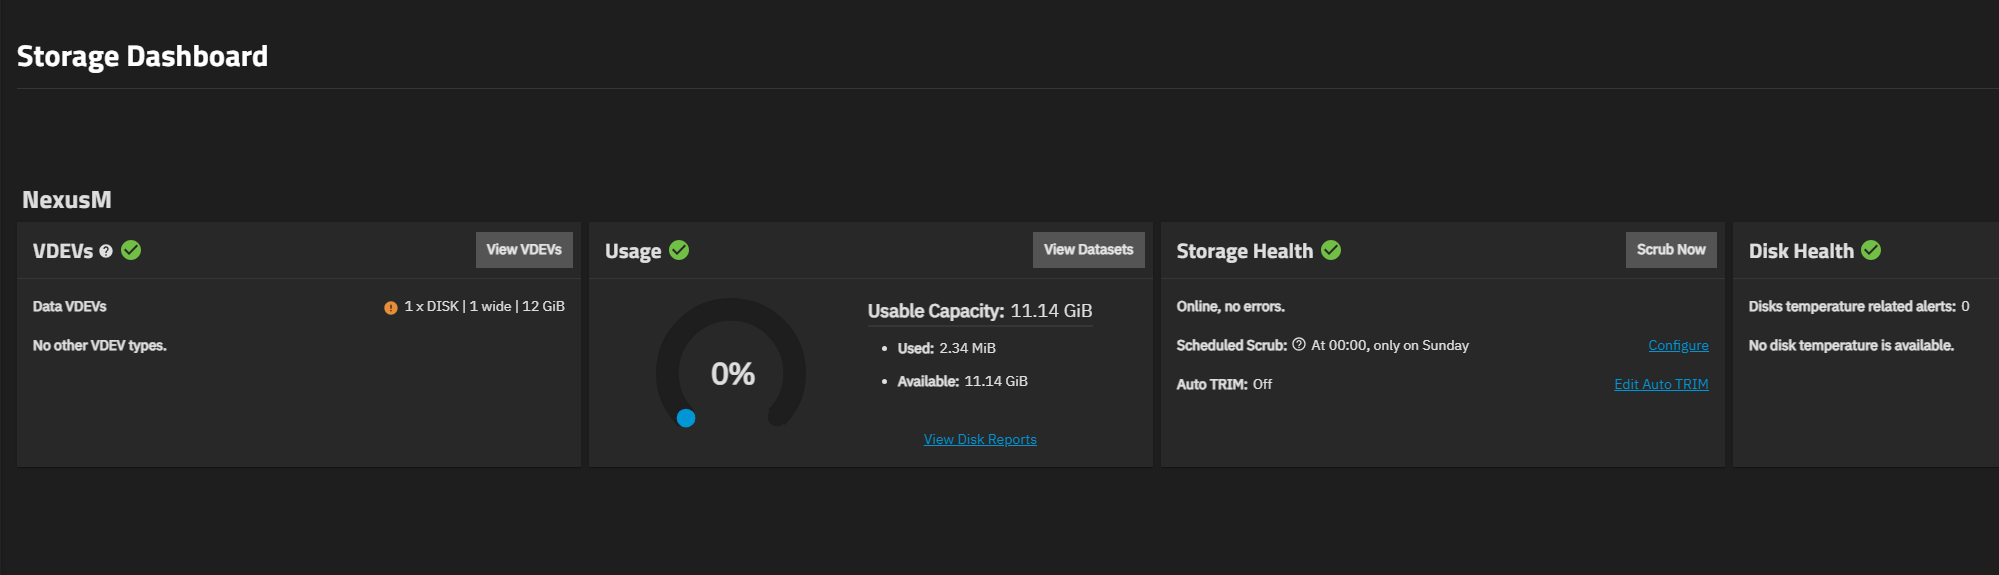
NexusM. This guide uses that name; adjust the paths below if you pick another. - Under Data VDEVs, add your spare disk. A single test disk uses a Stripe layout. TrueNAS warns "no redundancy", which is expected and fine for a test.
- Create Pool and confirm.
VM tip: if TrueNAS does not see the disk you added, reboot the VM. Hot-added virtual disks are often not detected until a restart. Then check Storage, Disks.
Step 2: Create datasets
These ZFS datasets hold NexusM's persistent data.
- Datasets in the sidebar, select the NexusM pool, then Add Dataset.
- Create these one at a time (name only, Dataset Preset set to Generic):
config,data,assets, and optionallylogs.
You end up with these datasets and host paths:
NexusM/config   ->  /mnt/NexusM/config
NexusM/data     ->  /mnt/NexusM/data
NexusM/assets   ->  /mnt/NexusM/assets
NexusM/logs     ->  /mnt/NexusM/logs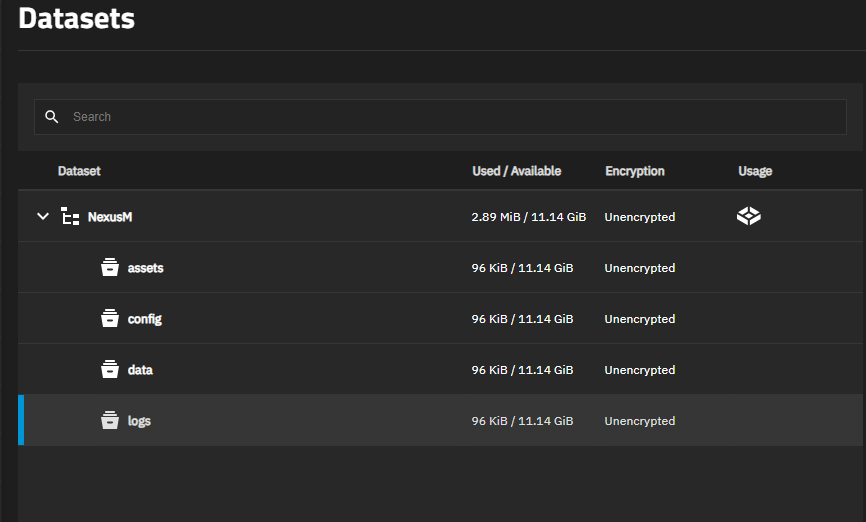
Step 3: Pre-create the config file
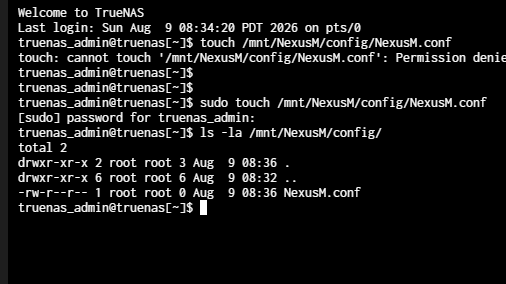
/app/NexusM.conf is a single file mount. If you bind-mount a path that does not exist yet, Docker creates a directory there instead, which breaks NexusM's config. So the file must exist before the app starts. NexusM fills an empty file with defaults on first run, so an empty file is all you need.
- System, then Shell in the sidebar.
- The shell logs in as
truenas_admin, not root, and the dataset is root-owned, so usesudo(it prompts for your admin password):sudo touch /mnt/NexusM/config/NexusM.conf - Verify it is a regular file (a leading dash, size 0, owned by root):
ls -la /mnt/NexusM/config/
Step 4: Install the NexusM Custom App
TrueNAS 25.10 "Goldeye" has no separate "Install via YAML" option. The Custom App button opens a GUI form, which is what we use.
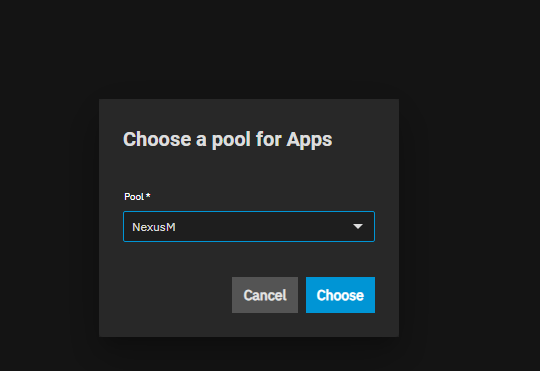
- Apps in the sidebar. On first use, TrueNAS asks you to choose a pool for Apps. Pick NexusM.
- Discover Apps, then Custom App (top right).
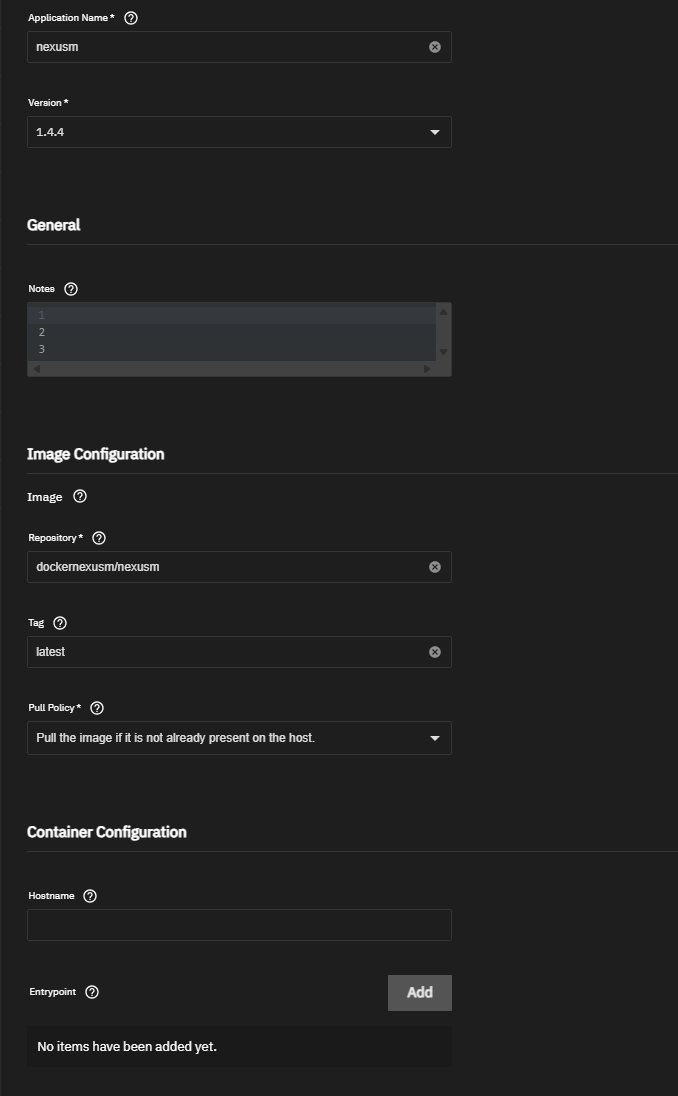
- Fill the form: Application Name
nexusm, Image Repositorydockernexusm/nexusm, Taglatest, Pull Policy left at default. Leave the template Version, Hostname, Entrypoint and Command at their defaults.
Step 5: Environment variables
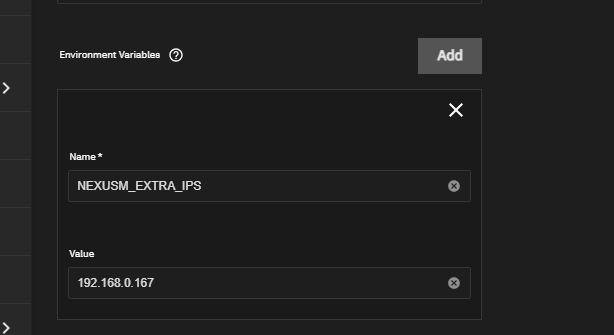
In the Environment Variables section, add:
| Name | Value | Why |
|---|---|---|
TZ | Your timezone, for example America/New_York or UTC | Correct timestamps |
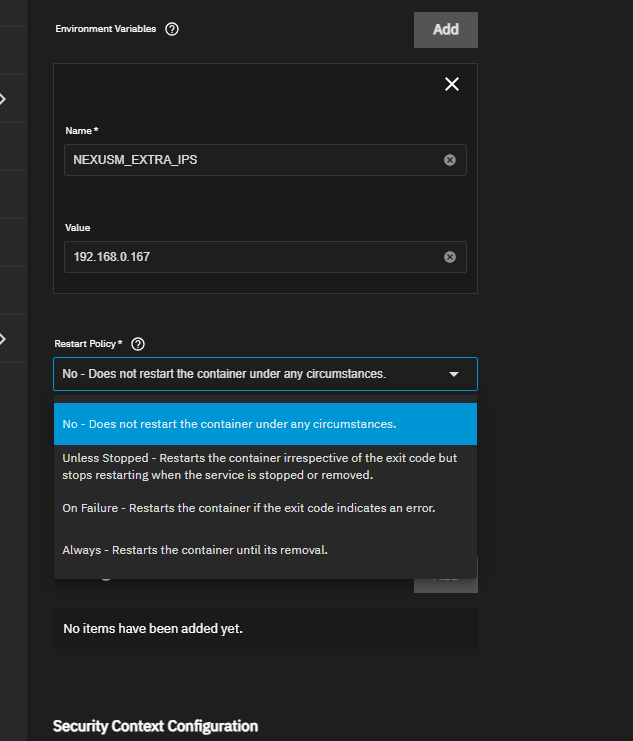
NEXUSM_EXTRA_IPS | Your TrueNAS LAN IP, for example 192.168.0.167 | Makes the self-signed HTTPS certificate trusted when you browse by IP |
Step 6: Ports
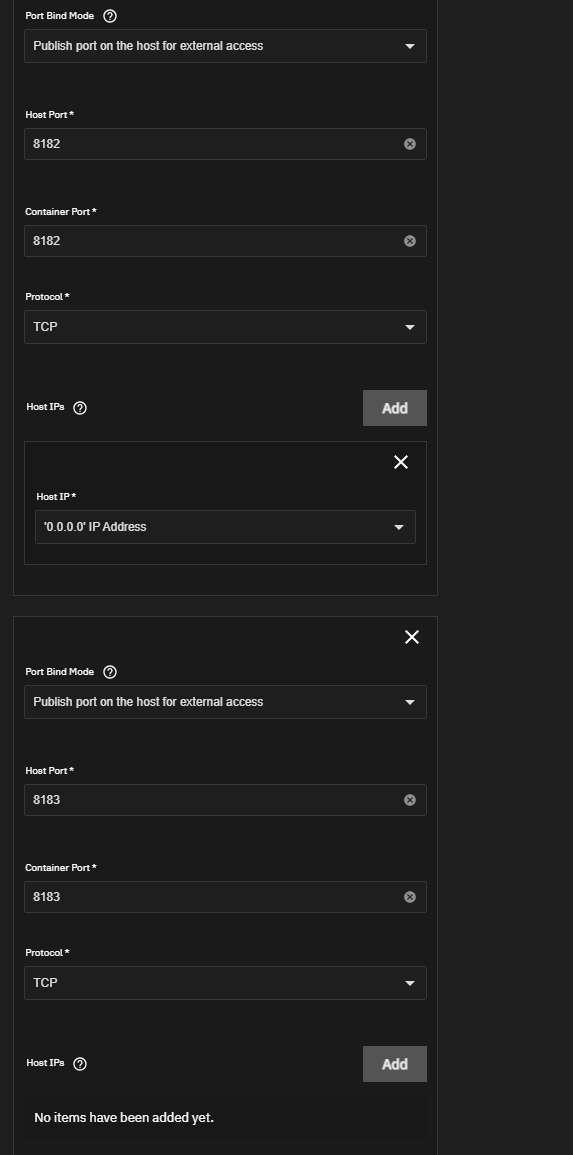
In Port Forwarding, add two entries with Port Bind Mode set to "Publish port on the host for external access":
| Host port | Container port | Protocol |
|---|---|---|
| 8182 | 8182 | TCP |
| 8183 | 8183 | TCP |
Step 7: Storage (the part that makes or breaks persistence)
Two traps that will cause a "fresh install on reboot" or a "Failed to save settings" error. Both were confirmed on 25.10:
- The default Storage type is ixVolume. Change it to Host Path for every entry, or your data lands in an opaque system-managed volume instead of your
/mnt/NexusM/...datasets. - The config file must be Host Path, never ixVolume. An ixVolume creates a directory, so
/app/NexusM.confbecomes a folder and NexusM cannot save settings. Host Path binds the actual file you created in Step 3.
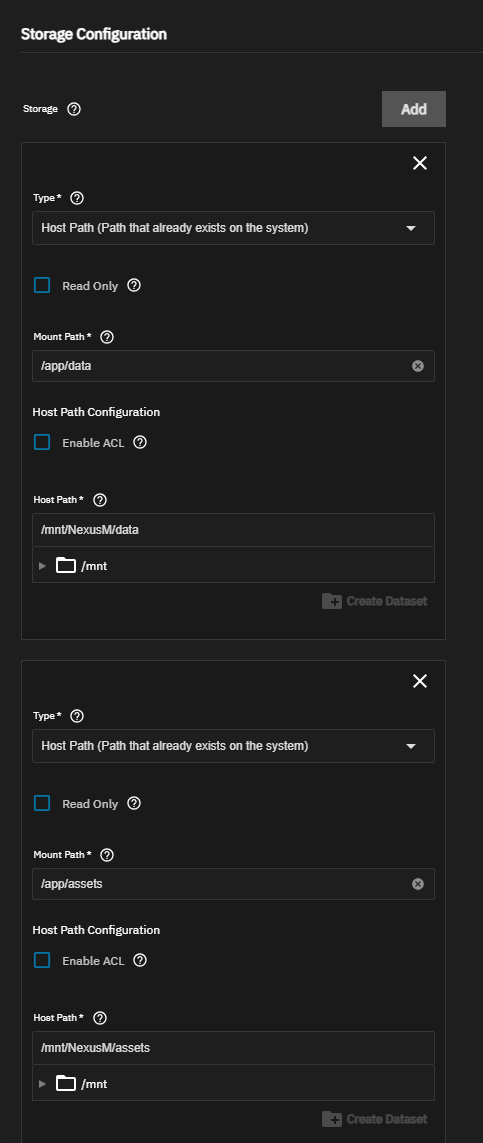
For each entry, set Type to Host Path (Path that already exists on the system), leave Read Only and Enable ACL off, then fill Mount Path and Host Path:
| Type | Mount path (container) | Host path (on TrueNAS) |
|---|---|---|
| Host Path | /app/data | /mnt/NexusM/data |
| Host Path | /app/assets | /mnt/NexusM/assets |
| Host Path | /app/logs | /mnt/NexusM/logs |
| Host Path | /app/NexusM.conf | /mnt/NexusM/config/NexusM.conf |
Media libraries are optional and can be added later with Read Only on, for example /media/movies pointing at your movies dataset.
Host Path Safety: if TrueNAS blocks Save with a "Host Path Safety" warning, go to Apps, Configuration, Settings and uncheck "Enable Host Path Safety Checks", save, then retry.
Step 8: Install and verify it is running
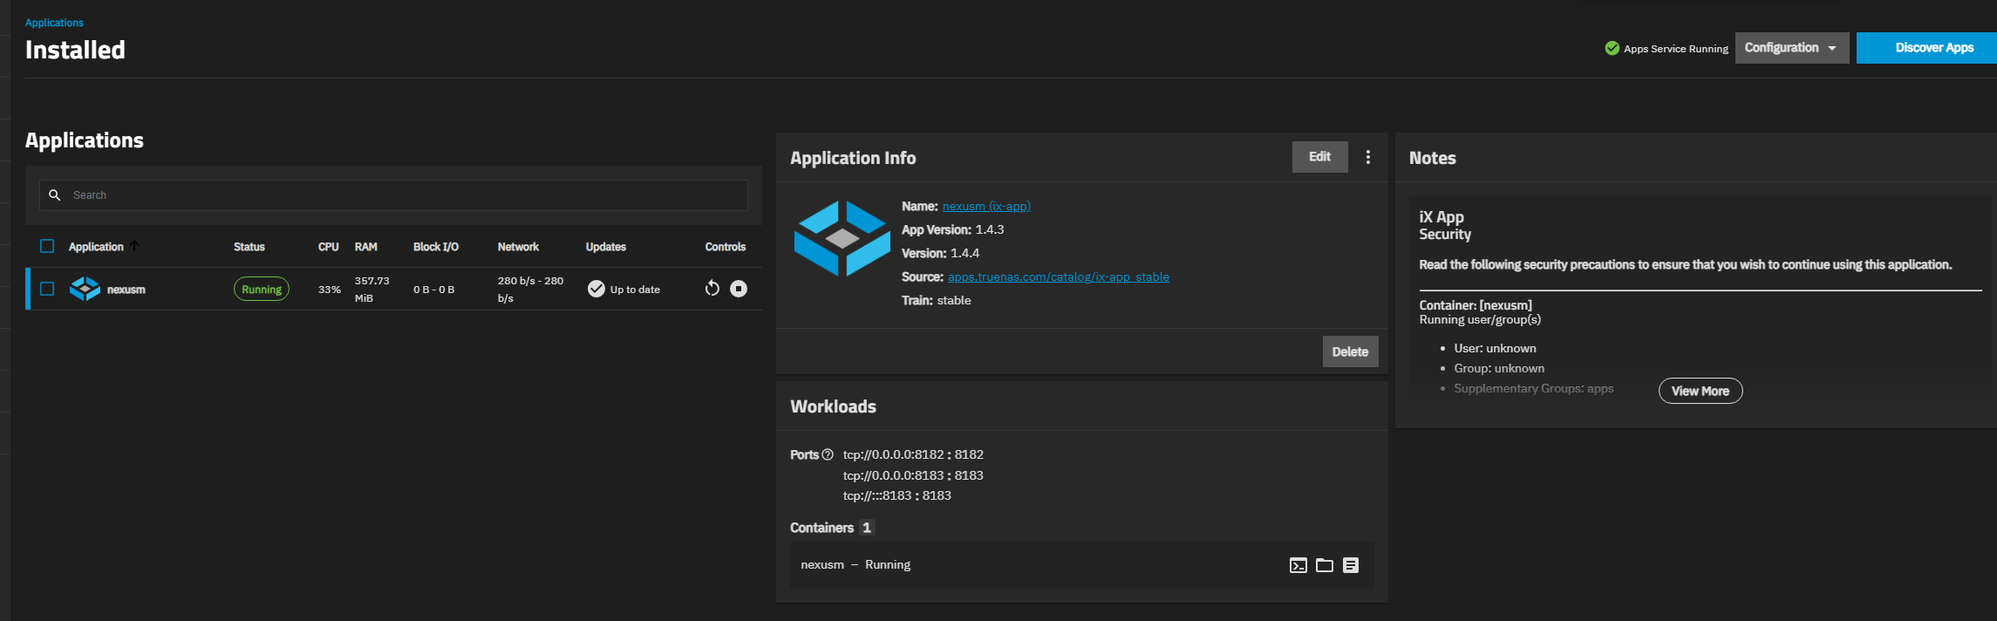
Click Install at the bottom of the form. TrueNAS pulls the image and starts the container. The Installed page should show nexusm Running, with ports 8182 and 8183 published.
Permissions: the NexusM image runs as root by default, which can write to the root-owned datasets and config file, so no UID or ACL change is needed. If you ever see write failures, open the container shell and run id. If it is non-root, either set User ID 0 and Group ID 0 in the app's User and Group section, or chown the datasets to the app UID.
Step 9: First run
- Browse to
http://<your-truenas-ip>:8182, for examplehttp://192.168.0.167:8182. - Complete the setup wizard: create the admin account, set the PIN, and add your library folders (point them at the
/media/...mounts if you added media). - Trigger a library scan.
NexusM ships with a default sign-in of user admin and PIN 000000. Change the PIN in Settings before giving anyone else access.
Sanity check: save a setting, for example paste a TMDB key, and confirm it saves without error. A "Failed to save settings" message here means /app/NexusM.conf is not a Host Path to the file (see Step 7, trap 2).
Step 10: Verify persistence
This is the whole point. Confirm nothing resets:
- Change a setting, for example paste a TMDB key.
- Restart just the NexusM app. The setting should persist.
- Reboot the entire TrueNAS system (power icon, Restart). The setting, the admin user and the scanned library should all persist.
- From System, Shell, confirm the datasets contain data:
sudo ls -la /mnt/NexusM/config/ /mnt/NexusM/data/NexusM.conf should be non-zero (it holds your changes) and data/ should contain .db files. If anything resets, a required mount, almost always /app/data or /app/NexusM.conf, is missing or pointed at the wrong path or type.
Step 11: Auto-start on boot (set Restart Policy to Always)
Do not rely on NexusM's own "Run on Startup" setting here. That toggle manages a systemd service and only applies to the bare-metal or Linux-portable install. Inside the TrueNAS container there is no systemd, so it does nothing. Auto-start is controlled by the container's Restart Policy.
The default Restart Policy is No, so the app will not come back after a reboot. You must change it.
- Installed, select
nexusm, then Edit. - Find Restart Policy (near the Environment Variables and Security Context section).
- Change it from No to Always (Restarts the container until its removal).
- Save and update. After the next reboot the app comes back Running on its own.
| Policy | Restarts on boot? |
|---|---|
| No (default) | No. The app stays Stopped after a reboot. |
| Unless Stopped | No, not if TrueNAS stopped it on shutdown, which it does. |
| On Failure | No, only on a crash or non-zero exit. |
| Always | Yes. Restarts on boot and on failure. Use this. |
Troubleshooting
| Symptom | Cause | Fix |
|---|---|---|
| "Failed to save settings" in NexusM | /app/NexusM.conf mounted as ixVolume, so it is a directory, not a file | Change that mount to Host Path, pointing at /mnt/NexusM/config/NexusM.conf (Step 7) |
| Settings or data reset to a fresh install after reboot | /app/data or /app/NexusM.conf not on a persistent Host Path | Fix the mounts (Step 7) |
| App is Stopped after every reboot | Restart Policy set to No (the default) | Set Restart Policy to Always (Step 11) |
| Storage went to an opaque ix-apps path | Mounts left as ixVolume, the default type | Change each to Host Path (Step 7) |
| Cannot create an app at all | No non-boot storage pool | Add a data disk, create a pool (Step 1) |
| HTTPS certificate not trusted by IP | The certificate only knows the container bridge IP | Set NEXUSM_EXTRA_IPS to the LAN IP (Step 5) |
| "Permission denied" for file operations in the shell | The shell user is truenas_admin, not root | Prefix the command with sudo |
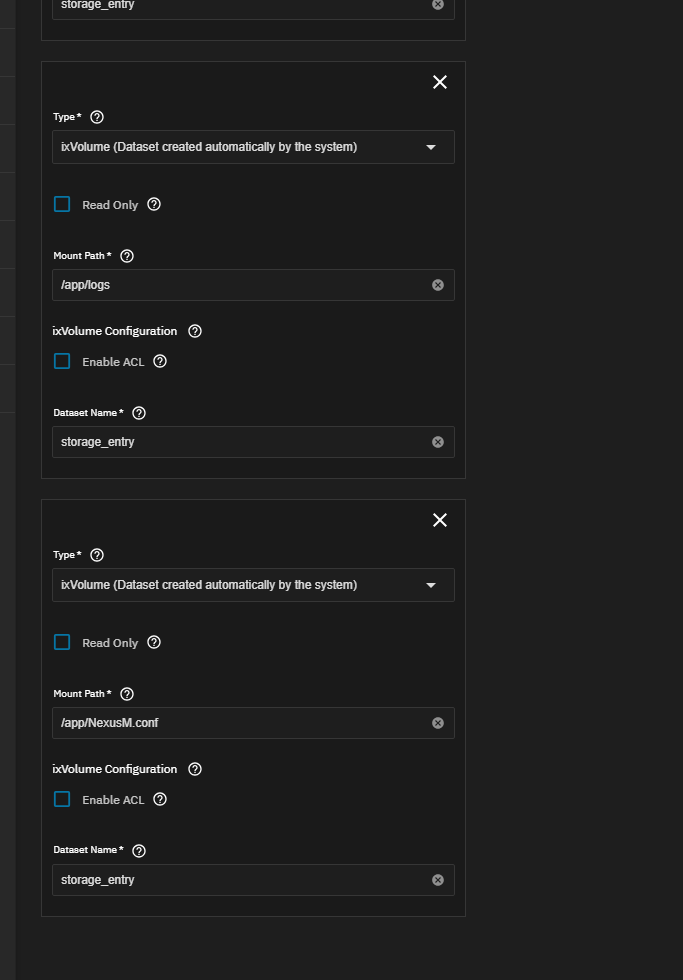
/app/NexusM.conf mounted as an ixVolume, which makes it a directory.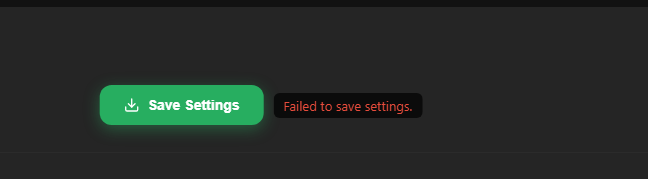
Appendix: example Docker Compose for TrueNAS
Adapt the host paths to your datasets. This is based on the project's docker-compose.yml, with the named volumes replaced by explicit host paths so they live on ZFS, and restart: always so the app returns after a reboot.
services:
  nexusm:
    image: dockernexusm/nexusm:latest
    container_name: nexusm
    restart: always
    ports:
      - "8182:8182"
      - "8183:8183"
    volumes:
      - /mnt/NexusM/config/NexusM.conf:/app/NexusM.conf
      - /mnt/NexusM/data:/app/data
      - /mnt/NexusM/assets:/app/assets
      - /mnt/NexusM/logs:/app/logs
      # Media (read-only):
      - /mnt/media/movies:/media/movies:ro
      - /mnt/media/tvshows:/media/tvshows:ro
      - /mnt/media/music:/media/music:ro
    environment:
      - TZ=UTC
      # - NEXUSM_EXTRA_IPS=192.168.1.100
    # Intel or AMD VAAPI transcoding:
    # devices:
    #   - /dev/dri:/dev/dri